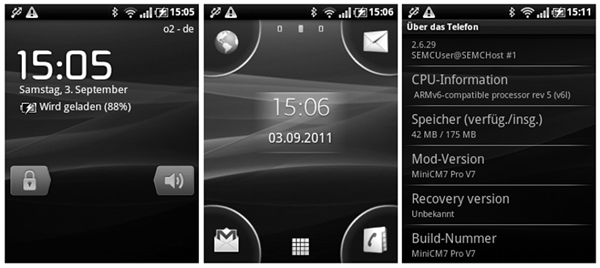
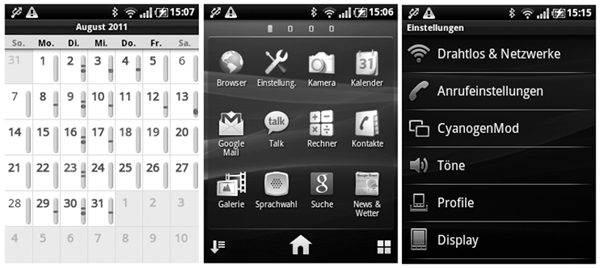
Sony Ericsson’s Xperia X10 Mini Pro is one of the smallest Android phones that is out there. In contrast to its smaller brother, the Xperia X10 Mini, it features a replaceable battery and a hardware keyboard which makes it both, more durable and easier to use for information management. Despite its age, it is equipped with a comparatively fast processor running at 600MHz and due to its age, you can easily get it for under 150€ – new. The major downside of this mobile phone is Sony Ericsson’s decision not to support it beyond Android Éclair. Although, I would prefer to live in a world where you do not have to care about the operating system version of your mobile phone, the fact that many new Google applications require at least Android Frozen Yogurt make this a hard pill to swallow. The good news is, there are custom ROMs available that allow you to catapult the mobile phone directly into 2011 without loosing its Sony Style.
 Xperia X10 Mini Pro: Gingerbread with Sony Style
Having played around with several custom ROMs from XDA developer lately, there are basically two options that are both somewhat suboptimal. The first one is to install MiniCM Pro V7x which is a port of the well known Cyanogen Mod. The good thing about this ROM is that – overall – it works very well but you will have to get used to a completely new visual appearance. On top of that, I found that the mobile phone started to react sluggish which was especially noticeable when scrolling through the program list. To avoid these issues, you can turn to Sonybread 7 SP3f instead. In contrast to MiniCM Pro, Sonybread provides a visual appearance that closely resembles the original experience of Sony Ericsson’s customizations to Android Éclair. In addition, I found scrolling to be much smoother when compared to MiniCM Pro.

Xperia X10 Mini Pro: Finally ready for new applications
Unfortunately, Sonybread has one key disadvantage over MiniCM Pro that makes it hard to recommend to most users. Instead of delivering 20+ hours of idle standby, Sonybread reduced the battery lifetime of my Xperia X10 Mini Pro to roughly 12 hours which is not sufficient for my usage pattern. In addition, Sonybread seemed to be less reliable, especially with respect to toggling GPS, which might explain the high energy drain. However, due to the fact that both ROMs do have the same root, it is possible to merge them in order to get the best of both worlds. To do this, you can follow this procedure:
- Download the zip files containing MiniCM Pro V7x as well as Sonybread 7 SP3f and extract them to separate folders on your PC.
- Copy all files in system/app from the Sonybread folder to the same location in the MiniCM Pro folder and overwrite the existing files.
- Delete ADWLauncher.apk, DSPManager.apk, AudioEffectService.apk, ThemeManager.apk and ThemeChooser.apk from system/app of the MiniCM Pro folder. As they are slow (ADWLauncher), known to cause battery drainage (DSPManager/AudioEffectService) or broken (ThemeManager/ThemeChooser). Furthermore, you might want to delete all theme packages (Thm*.apk), AdobeFlashPlayer.apk, Email.apk and FileManager.apk.
- Copy framework.jar and framework-res.apk from system/framework of the Sonybread folder to the same location in the MiniCM Pro folder and overwrite the existing files.
- Copy bootanimation.zip from media of the Sonybread folder to the same location of the MiniCM Pro folder and overwrite the existing file.
- Finally, zip all contents of the MiniCM Pro folder into a new zip file and use it as your new custom ROM.
If you are already running a custom ROM, you can simply use cwm recovery to install the package. If you are still on Sony Ericsson’s stock ROM, you can follow any custom ROM tutorial that you like. Here is the usual list of steps:
- Update your phone to the latest version using Sony Ericsson’s PC Companion. This is necessary since both MiniCM Pro and Sonybread rely on a specific version of the operating system kernel.
- Get root access to your phone (e.g. by running the SuperOneClick tool which uses a buffer overflow in the sqlite database to get a root shell).
- Install busybox on your mobile phone and make it exectuable. Usually, this requires you to remount the /system file system on your phone with write access (e.g. mount –o remount –r –w /dev/block/mtdblock0 /system) and copy the busybox executable to /system/bin (e.g. cat /sdcard/busybox > /system/bin/busybox) and finally, change the file permissions (e.g. chmod 700 /system/bin/busybox).
- Install cwm recovery on your mobile phone. Usually, this requires you to unpack the zip file on your SD card and copy the contents of it to your mobile phone’s memory. If you have already rebooted, you need to remount /system and then you can use busybox to copy the files (e.g. busybox cp –R /sdcard/cwm /). Finally, you need to set the permissions (e.g. chmod 700 /system/bin/chargemon).
- Copy the zip with the ROM to the SD card, reboot and press and release the back button (several times) as soon as you see Sony Ericsson printed across the screen.
- Once cwm recovery shows up, perform a factory reset and install the zip file with the ROM. To play it save, you might want to format the system partition first, yet, be aware that you can no longer reboot into recovery once the format has completed. If anything goes wrong at this stage, you should be able to go back to the stock ROM by using the repair phone option in Sony Ericsson’s PC Companion Software.
As soon as you are done with the install of the ROM, you might want to install the Google Mail application and the multi-touch driver to use gestures such as pinch-to-zoom. Both can be installed easily using cwm recovery. Note that you can use the built-in Mini ROM Manager app to change your keyboard layout, if necessary. Enjoy.