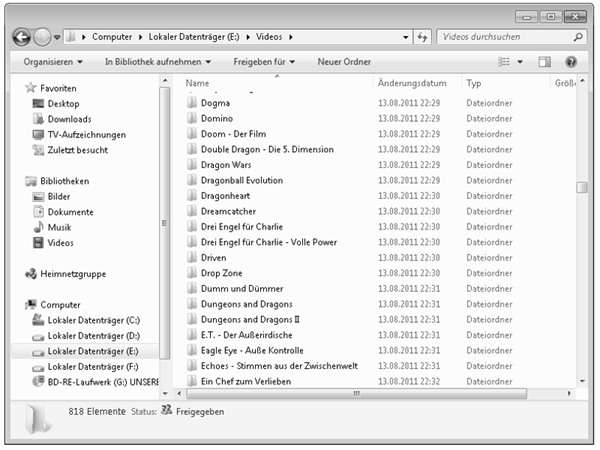
After you have converted your recordings into a movie library, you are able to browse and watch movies conveniently using Windows Media Center or an extender such as the Xbox 360. Sometimes, however, you might want to access your library from your notebook or some other machine instead. Although, there is no technical reason for excluding extender technology from Windows, unfortunately, that is simply the current state of affairs. A simple way to stream your movies is to share the folder containing them with Windows built-in CIFS file sharing. However, that way, your browsing experience will be limited to reading a potentially long list of file names and you will not be able to easily read and search the associated metadata. To improve the browsing experience, I have written a simple ASP.NET web application that you can run on Windows’ built-in web server, i.e. the Internet Information Server.
Browsing with Windows Explorer: It works … somewhat
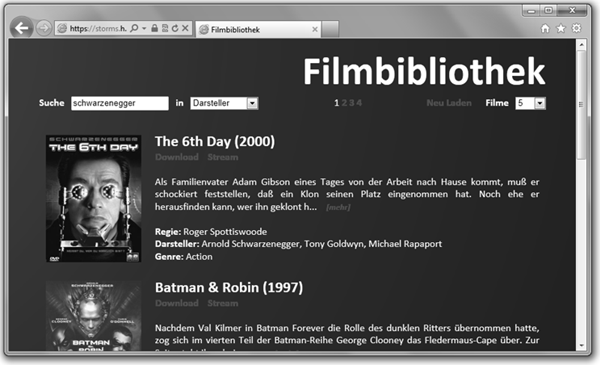
After a successful installation and configuration, the movie library web application automatically scans your movie directory and parses the metadata for each movie. From this information, it dynamically generates web pages that allow you to browse and search your library. Furthermore, it provides a download and a streaming button for each movie. When using Internet Explorer, a click on a link will start the corresponding movie with Windows Media Player in download or streaming mode.
Browsing with Movie Library: Trust me, it is nicer
Streaming mode allows you to directly jump to a particular point in each file, but it only buffers a limited amount of data. Download mode requires you to watch the movie sequentially, but it will download the whole file in the background. This is especially useful, if your movies are encoded with a bitrate that exceeds your network bandwidth – since you can start the download, pause the movie, wait some time and have a coffee and then watch it without buffer underflows.
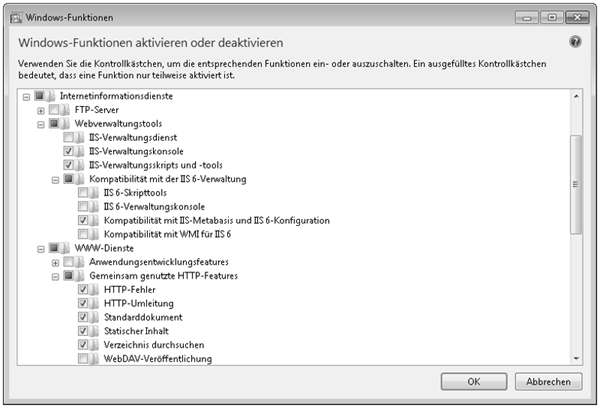
The first step towards getting your movie library on the web is to install Internet Information Server. Open the control panel on your machine and go to add/remove programs. Chose activate Windows functions on the left side of the window and go to Internet Information Services. Install the necessary web services including static pages and default document. Furthermore, add the administration console and finally, install the meta base compatibility with IIS 6. After the installation has been completed, you should be able to see a web page – or at least a 404 page not found error – when browsing to http://localhost. Note that in order to see the page from some other machine on your network, you might have to configure the Windows Firewall with an inbound accept all TCP rule on port 80 (for HTTP) and 443 (if you are planning on using HTTPS).
Internet Information Server – Make sure to install IIS 6 compatibility
The second step is to install the ASP.NET movie library application. Just download it and run the x86 or x64 installer, pick a target folder on your new web server and hit the ok button. If you did not install the full version of the .NET Framework 4.0 for some other application, the installer will first direct you to a Microsoft page where you can download it. Note that the client version of the framework (which is usually installed through Windows Update) is not sufficient since it does not include ASP.NET. Also note that if you did not install compatibility with IIS 6, the installer will fail with a generic installation interrupted message.
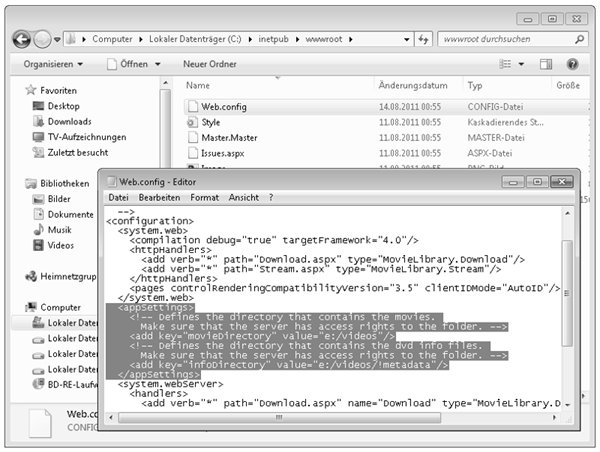
ASP.NET Movie Library Configuration: Set the movie and metadata directory in web.config
The third and final step of the process is to configure the application and to check the web server ASP.NET settings. To configure the application, navigate to the folder in which you installed it. Normally, the folder resides under C:\Inetpub\wwwroot. Within the folder, find the web.config file and open it in notepad. Navigate to the appSettings section and modify the value of the movie directory so that it points to the folder that contains your movies. Then, modify the value of the info directory so that it point to the folder that contains your metadata XML files. After changing the values, save the file and make sure that the web server has read access to both folders. Once this is done, you can try open the library in your browser by navigating to http://localhost/<installpath>/Default.aspx. If everything works out, you are done.
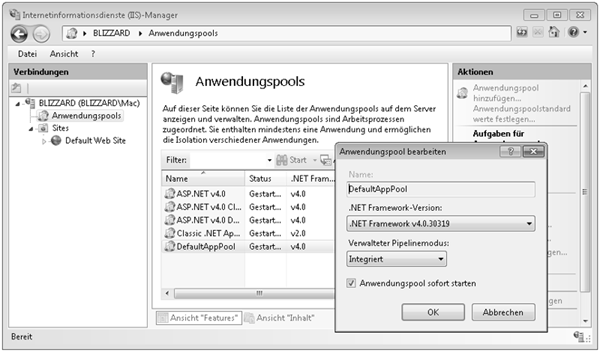
Internet Information Server Manager: Make sure to run the application pool with .NET 4
If you see a resource not found error, open the Internet Information Services Manager from the start menu (e.g. by searching for IIS). Open the local web site and select the application pools node. In the node, select the pool in which you installed the movie library application. If you did not specify anything during the installation, use the default pool. Double click the pool and make sure that it runs .NET Framework in version 4. Once this is done, you should be able to browse and stream your library. If some (or all) of the metadata does not show up properly, you can navigate to a built-in debugging page via http://localhost/<installpath>/Issues.aspx. If you see movies but none of them have a proper description, chances are that the web server does not have read access to the metadata folder. If you do not see any movie at all, the server either has no access to the movie folder (and its subfolders) or the folder is not configured properly in the web.config file. Feel free to send me an email, if you experience other issues.
