A couple of days after reinstalling Windows 10 on my Surface Pro using a Windows 10 DVD created with Microsoft’s Media Creation Tool, I realized that BitLocker was not working properly. When looking into this, I found out that this was caused by the fact that the setup program of Windows 10 Version 1803 did not setup the Windows Recovery Environment properly. To be more specific, with 499MB, the partition created by the setup program was simply too small to fit the current version of Windows Recovery Environment.
When activating the BitLocker for my system drive, BitLocker detected that the Recovery Environment was not working and rightfully decided to shrink the main system partition to add another partition with 868MB at the end of the disk. However, this new recovery disk was also non-functional. As a result, BitLocker reported that my Surface Pro “does not support entering a BitLocker recovery password during startup” and that I should ask my “administrator to configure Windows Recovery Environment so that you can use BitLocker”.
Disk Partitioning with Diskpart
If you are like me then you do not have an administrator that you can ask to set it up for you and you must figure out how to do it on your own. So here is what worked for me:
- Open cmd as administrator: search for cmd in the start menu right-click and select run as administrator).
- Format and mount the 868MB partition created by BitLocker:
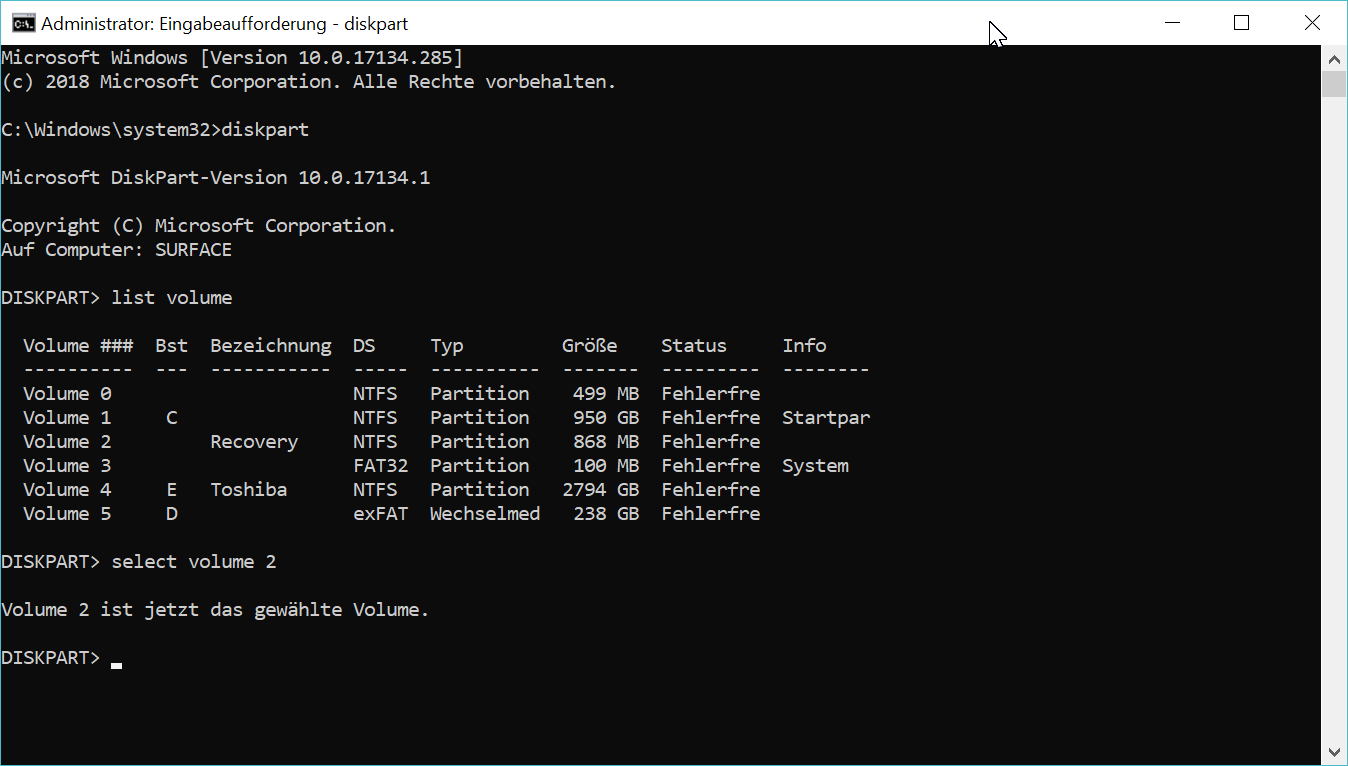
- Start the diskpart utility:
diskpart - Find the 868MB partition from the available volumes:
list volume - Select the partition:
select volume X - Format the partition and assign a label:
format fs=ntfs label=”Recovery” quick override - Mount the partition as Q:
assign letter=q - Close diskpart:
exit
- Start the diskpart utility:
- Copy the Windows Recovery Environment from your windows folder onto the mounted partition using robocopy:
robocopy C:\Windows\System32\Recovery\ Q:\Recovery\WindowsRE\ Winre.wim /copyall /dcopy:t - Configure the Windows Recovery Environment:
reagentc /setreimage /path Q:\Recovery\WindowsRE - Enable the Windows Recovery Environment:
reagentc /enable - Unmount the partition containing the Windows Recovery Environment:
- Start the diskpart utility:
diskpart - Select the partition:
select volume X - Unmount the partition:
remove letter=q - Close diskpart:
exit
- Start the diskpart utility:
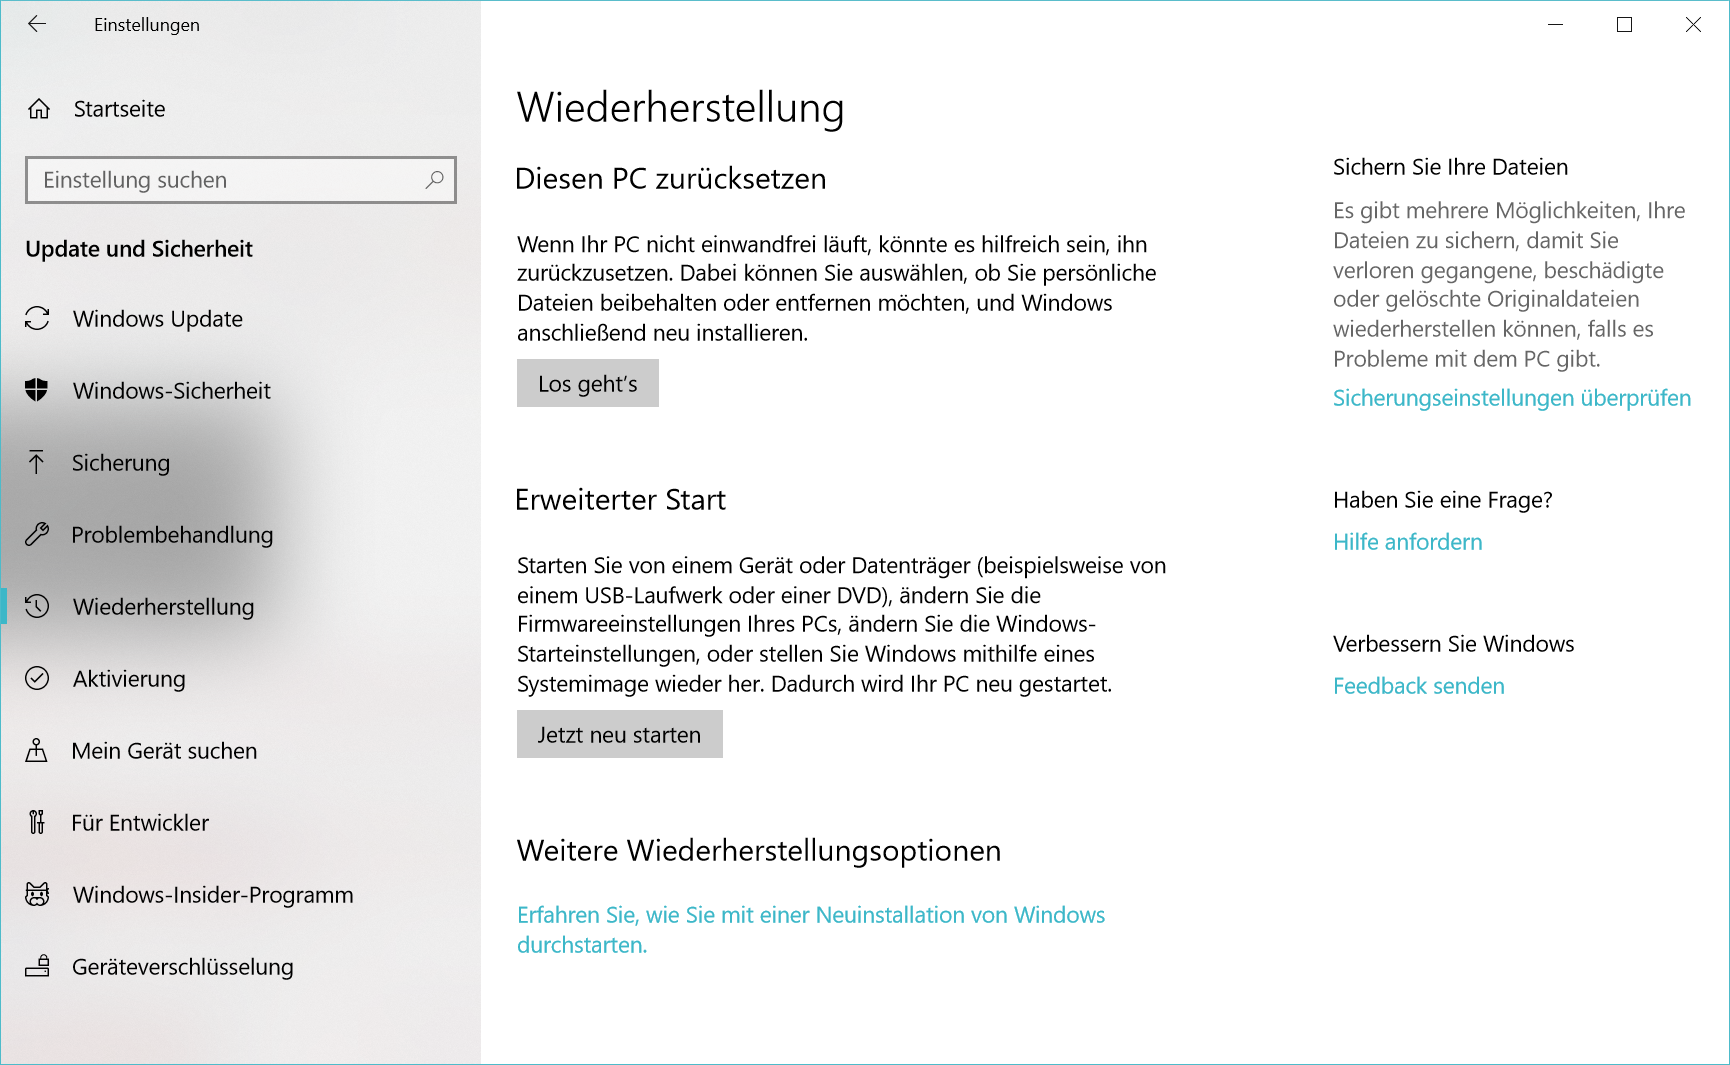
Now you should be able to use your new Windows Recovery Environment during an advanced startup. To boot in advanced startup mode, open the Windows settings, then open the “update and security” section, go to “recovery” and choose “advanced startup”.
Testing with Advanced Startup
After the reboot, you will see a blue menu and there should be about 7 different options in the advanced recovery section. The options should include restoring Windows from a previously created system restore point. If you only see one or two (configure UEFI and something else), something went wrong, and you might want to go over the previous list of tasks again.
If everything went well, you can simply reboot your machine and turn on BitLocker. Have fun.